How to Set Up MCP Servers in Claude
How to Set Up MCP Servers in Claude
The Model Context Protocol (MCP) has been making waves in the AI community ever since it was introduced. And rightly so. By standardizing the way applications provide context to Large Language Models (LLMs), MCP allows for seamless integration between AI models and external tools and data sources. This enables AI agents and LLMs to perform tasks beyond mere text generation. For example, we can integrate the GitHub MCP server with Claude and ask Claude (through prompts) to create a new GitHub repository or push files in a commit. Claude will then automatically perform these tasks, saving lots of time.
Similarly, there are many other useful MCP servers that we can integrate with Claude to automate tasks and save time.
In this article, we’ll provide a step-by-step guide for setting up different MCP servers in Claude Desktop.
Let’s first briefly discuss what MCP servers are.
What are MCP Servers?
MCP servers are the actual implementation of the model context protocol on the server side. These servers expose specific capabilities, such as reading files, querying databases, or interacting with APIs through a uniform interface, allowing AI models to access diverse resources without needing custom integrations.
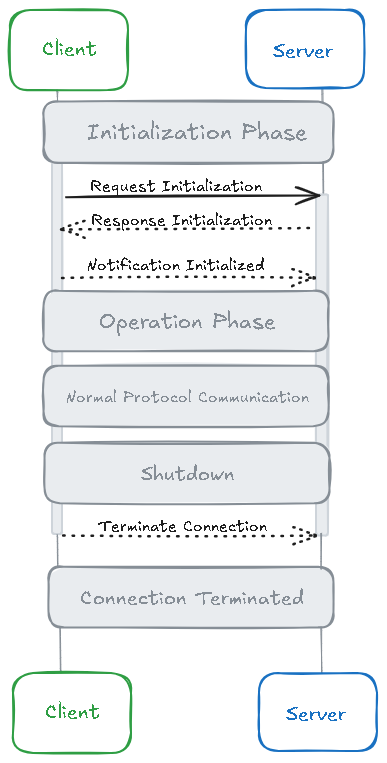
It’s important to know that MCP servers can only be connected to MCP clients, such as Claude, Cursor, and VS Code. The figure below shows the detailed client-server connections lifecycle in the MCP architecture:
Connecting MCP Servers to Claude
Here we’ll show you how to connect different MCP servers to Claude Desktop and use them within Claude.
Install Node.js
First, install Node.js if it’s not already installed on your system, as most MCP servers are built with Node.js. Download the "LTS" version and run the installer.
Once installed, open your terminal and run:
node -v
npm - v
If node is properly installed, running these commands will show the installed versions.
Install Claude Desktop
Since we’ll connect our MCP servers to Claude, we need to download Claude Desktop, as it supports MCP. Download the version for your operating system, such as Windows, Mac, or Linux.
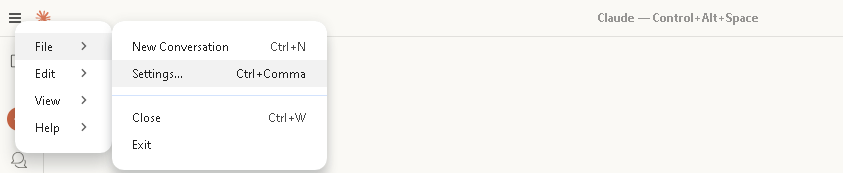
To connect an MCP server to Claude, we need to modify the claude_desktop_config.json file. To locate this file, open the Claude Desktop and go to settings:
Then go to the Developer settings and click ‘Edit Config':
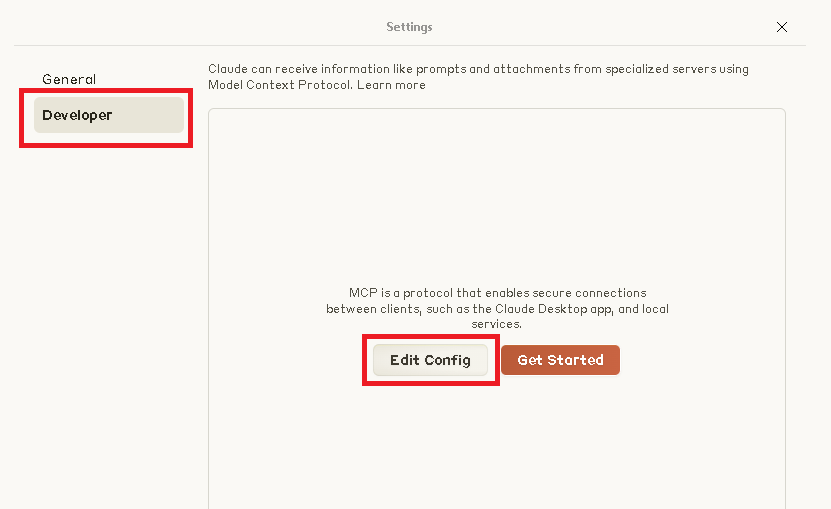
This will take you to your claude_desktop_config.json file.

The configuration file uses JSON format. When you open this file, an empty configuration file will look like this:
{
  "mcpServers": {}
}
Each MCP server you add will go inside the mcpServers object.
Installing the File System Access MCP Server
Let's start with a simple MCP server built for file system access. It’s a very useful server that lets Claude access files on your computer.
To install the server, open your terminal or command prompt. We’ll first create a project and navigate to it:
mkdir my-project

cd my-project

npm init -y
Now, we’ll install our server:
npm install @modelcontextprotocol/server-filesystem
This installs the package locally to your project.
Connecting the server to Claude
Open your claude_desktop_config.json file in your code editor and put the following code in it:
{
  "mcpServers": {
    "filesystem": {
      "command": "npx",
      "args": [
        "@modelcontextprotocol/server-filesystem",
        "/absolute/path/to/your/project"
      ]
    }
  }
}
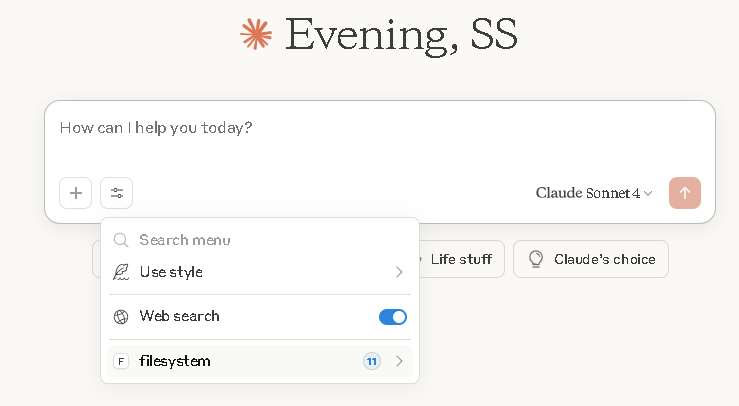
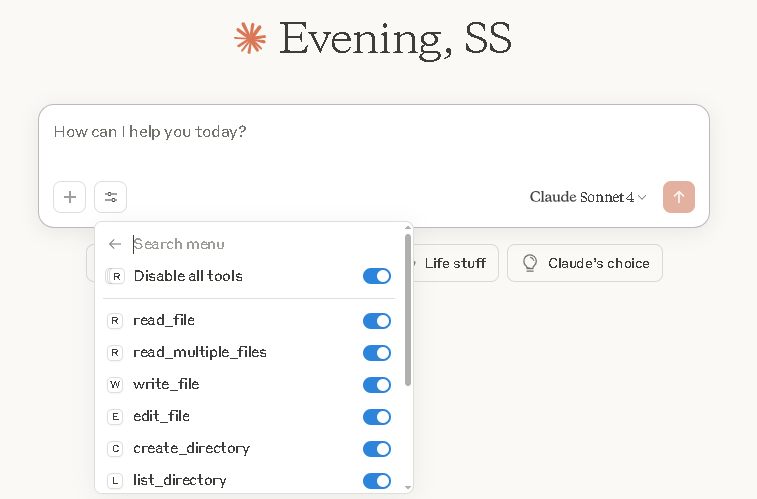
Now, restart Claude Desktop, and you’ll see your MCP server under Tools:
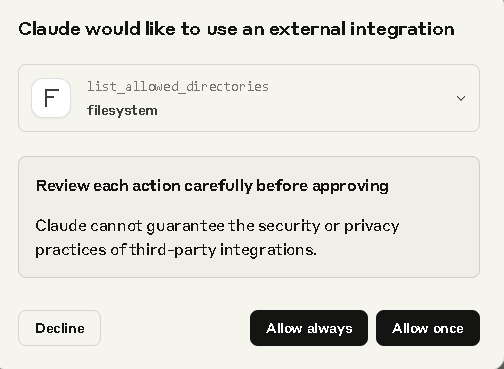
Now, when you enter a prompt like ‘create a new file named MCP’, Claude will first ask permission to use the filesystem MCP server:
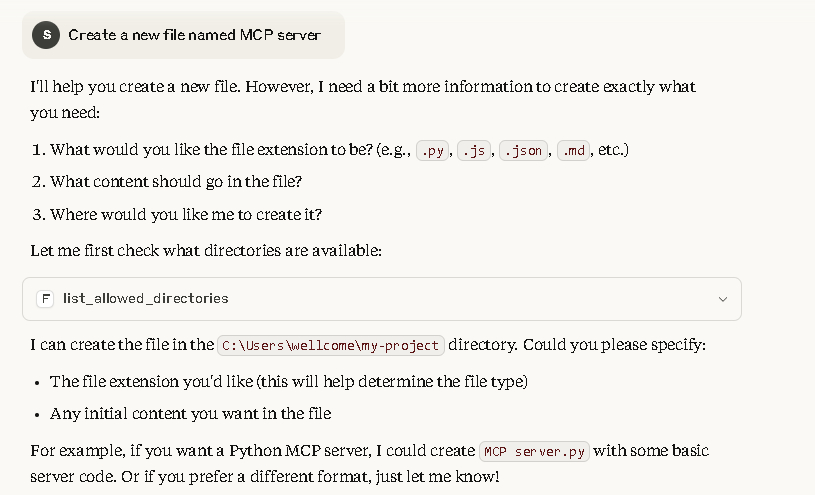
It’ll then provide a response like this:
Setting Up the Knowledge Graph Memory MCP Server in Claude
Now, let’s set up another useful MCP server in Claude. This server provides persistent memory capabilities to LLMs, enabling them to remember information about the user even in new chats. This means LLMs can provide responses based on past interactions and user preferences.
If you’ve ever used LLMs like Claude or ChatGPT, you know how useful this feature is. Here’s how you can set up this server in Claude:
In the same project directory that we created for the previous server, run the following command to install the Knowledge Graph Memory MCP Server:
npm install @modelcontextprotocol/server-memory
Connecting the server to Claude
We’ll now modify our claude_desktop_config.json file. We’ll keep the previous (file system server) and add this MCP server below it. So the complete code will look like this:
{
  "mcpServers": {
    "filesystem": {
      "command": "npx",
      "args": [
        "@modelcontextprotocol/server-filesystem",
        "/path/to/your/directory"
      ]
    },
    "memory": {
      "command": "npx",
      "args": ["@modelcontextprotocol/server-memory"]
    }
  }
}
We don’t need to add the path again as this server is in the same project directory.
Now, when we restart Claude, it will show us both our MCP servers:
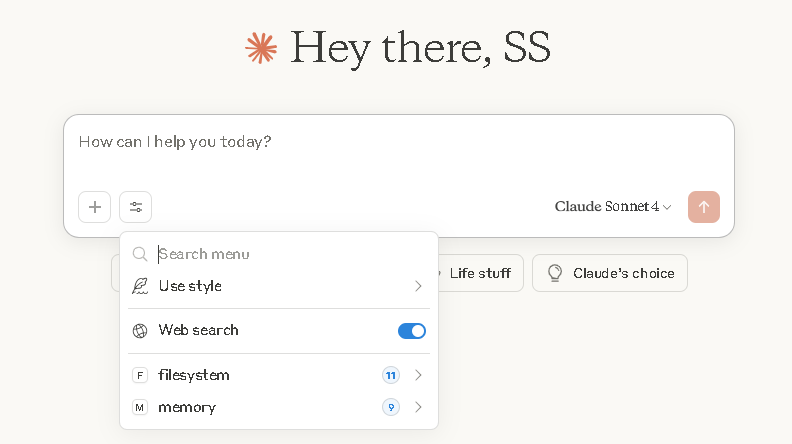
Similarly, you can add many other helpful MCP servers to Claude, such as Web Search Server that lets Claude search the web, SQLite Database Server, and more.
Building your Own MCP Server and Connecting It to Claude
Here we’ll build a simple TypeScript-based MCP server that exposes a single MCP prompt called space-fact. MCP prompts are basically reusable templates containing messages. The server exposes these prompts to the MCP client which then provides it to the LLM to guide its behavior.
So, when we connect our MCP server to Claude and use the defined prompt, Claude will automatically generate a random fact about space.
Let’s build our MCP server with a ‘space fact’ prompt. First, create a new project, move to the project directory, and initialize a node project:
mkdir space-fact-server

cd space-fact-server

npm init -y
Modify the package.json file so it looks like this:
{
  "name": "space-fact-server",
  "version": "1.0.0",
  "type": "module",
  "scripts": {
    "build": "tsc",
     "test": "echo \"Error: no test specified\" && exit 1"
  },
  "dependencies": {
    "@modelcontextprotocol/sdk": "^1.11.2",
    "zod": "^3.24.4"
  },
  "devDependencies": {
    "typescript": "^5.8.3",
    "@types/node": "^20.17.46"
  }
}
Create a tsconfig.json file and make sure it looks like this:
{
  "compilerOptions": {
    "target": "ES2022",
    "module": "nodenext",
    "moduleResolution": "nodenext",
    "outDir": "./build",
    "rootDir": "./src",
    "strict": true,
    "esModuleInterop": true,
    "skipLibCheck": true,
    "forceConsistentCasingInFileNames": true
  },
  "include": ["src/**/*"]
}
Now, create an index.ts file in the src folder. We’ll create our MCP server in this file.
First, we’ll define the necessary imports, such as Server, which is the core class to create an MCP server:
import { Server } from "@modelcontextprotocol/sdk/server/index.js";
import { StdioServerTransport } from "@modelcontextprotocol/sdk/server/stdio.js";
import {
  ListPromptsRequestSchema,
  GetPromptRequestSchema
} from "@modelcontextprotocol/sdk/types.js";
Next, we’ll define the allowed prompt name, specify its structure, and finally declare the prompt called space-fact:
// Define a type for prompt names
type PromptName = "space-fact";

// Define the prompt structure
interface Prompt {
  name: string;
  description: string;
  arguments: { name: string; description: string; required: boolean }[];
}

// Define your prompt
const PROMPTS: Record<PromptName, Prompt> = {
  "space-fact": {
    name: "space-fact",
    description: "Generate a fun fact about space",
    arguments: []
  }
};
Now, we’ll create the server:
//creates the server
const server = new Server(
  {
    name: "space-fact-prompts-server",
    version: "1.0.0"
  },
  {
    capabilities: {
      prompts: {
        names: Object.keys(PROMPTS)
      }
    }
  }
);
Next, we’ll register the handler to list prompts:
server.setRequestHandler(ListPromptsRequestSchema, async () => {
  return {
    prompts: Object.values(PROMPTS)
  };
});
We also need to register the handler to get a specific prompt:
server.setRequestHandler(GetPromptRequestSchema, async (request) => {
  const promptName = request.params.name as PromptName;

  if (promptName === "space-fact") {
    return {
      messages: [
        {
          role: "user",
          content: {
            type: "text",
            text: "Tell me a fun fact about space."
          }
        }
      ]
    };
  }

  throw new Error(`Prompt not found: ${promptName}`);
});
Finally, we’ll start the server using the stdio transport:
const transport = new StdioServerTransport();
await server.connect(transport);
Here is the complete code:
import { Server } from "@modelcontextprotocol/sdk/server/index.js";
import { StdioServerTransport } from "@modelcontextprotocol/sdk/server/stdio.js";
import {
  ListPromptsRequestSchema,
  GetPromptRequestSchema
} from "@modelcontextprotocol/sdk/types.js";

// Define a type for prompt names
type PromptName = "space-fact";

// Define the prompt structure
interface Prompt {
  name: string;
  description: string;
  arguments: { name: string; description: string; required: boolean }[];
}

// Define your prompt
const PROMPTS: Record<PromptName, Prompt> = {
  "space-fact": {
    name: "space-fact",
    description: "Generate a fun fact about space",
    arguments: []
  }
};

//creates the server
const server = new Server(
  {
    name: "space-fact-prompts-server",
    version: "1.0.0"
  },
  {
    capabilities: {
      prompts: {
        names: Object.keys(PROMPTS)
      }
    }
  }
);

// Register handler to list prompts
server.setRequestHandler(ListPromptsRequestSchema, async () => {
  return {
    prompts: Object.values(PROMPTS)
  };
});

// Register handler to get a specific prompt
server.setRequestHandler(GetPromptRequestSchema, async (request) => {
  const promptName = request.params.name as PromptName;

  if (promptName === "space-fact") {
    return {
      messages: [
        {
          role: "user",
          content: {
            type: "text",
            text: "Tell me a fun fact about space."
          }
        }
      ]
    };
  }

  throw new Error(`Prompt not found: ${promptName}`);
});

// Start the server using stdio transport
const transport = new StdioServerTransport();
await server.connect(transport);

// Optional: Log to stderr to confirm startup
console.error("Space Facts MCP Server running and connected via stdio");
Now, run this command in your terminal:
tsc
Connecting our server to Claude
Here’s how you can add the server to the claude_desktop_config.json file:
{
  "mcpServers": {
    "filesystem": {
      "command": "npx",
      "args": [
        "@modelcontextprotocol/server-filesystem",
        "/path/to/your/directory"
      ]
    },
    "memory": {
      "command": "npx",
      "args": ["@modelcontextprotocol/server-memory"]
    },
    "space-facts": {
      "command": "node",
      "args": ["/path/to/your/index.js"]
    }
  }
}
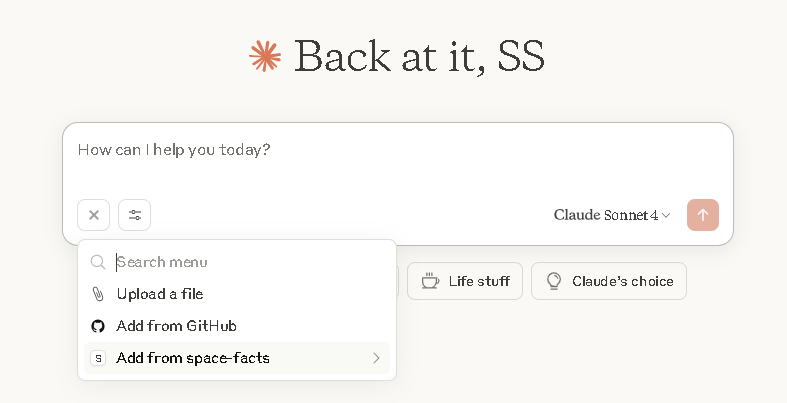
Now, when we restart Claude, our MCP server will connect to it. One thing to note here is that since we haven’t defined any tools in our server, when you see the option in the ‘tools’ section, it will show disabled. Since our server only exposes an MCP prompt, it will appear in the ‘+' section in Claude:
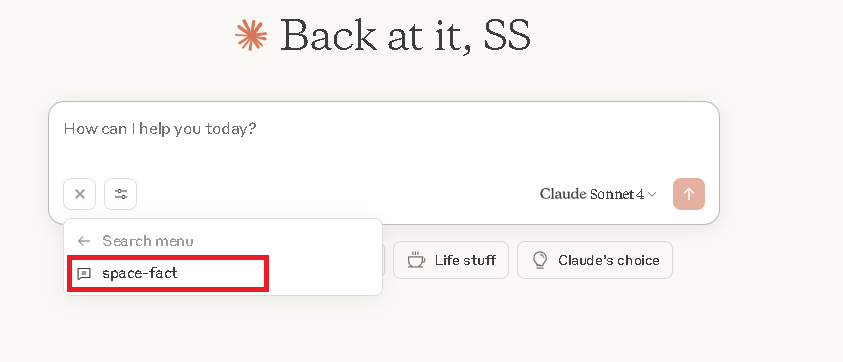
When we click on it, it’ll attach our space-fact prompt to the chat bar:
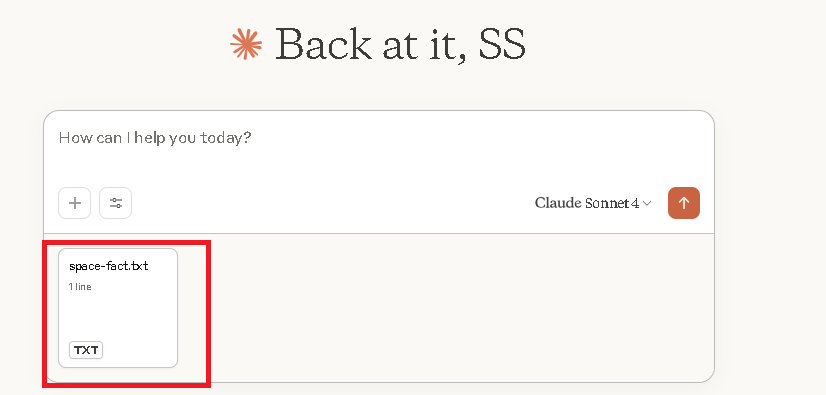
Now, we don’t need to manually provide any prompts. We can simply send the attached prompt, and Claude will automatically generate a random space fact:
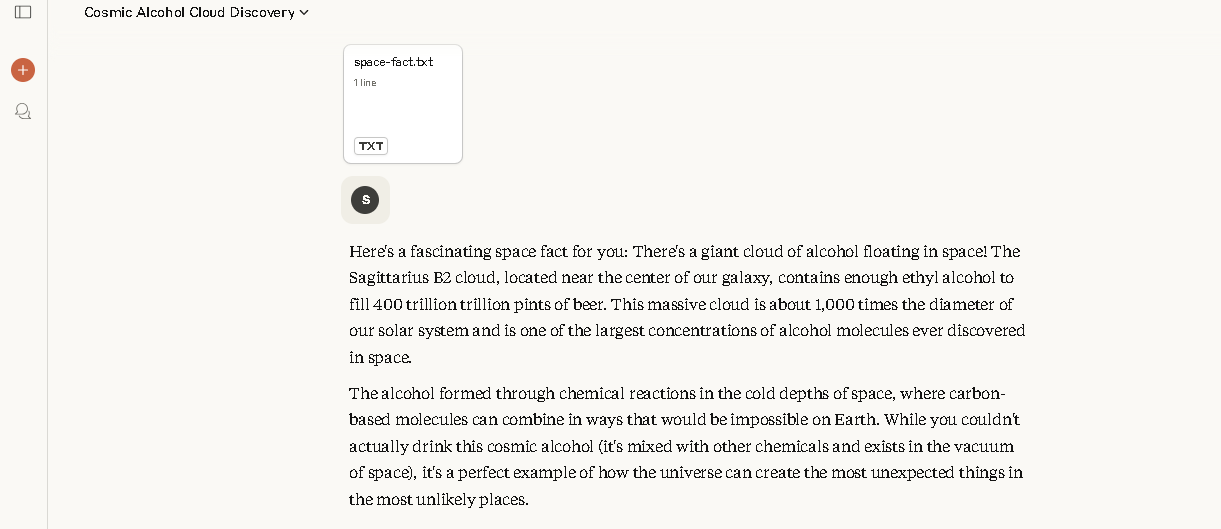
While this server is just for demonstration, we can create useful prompts that can help save time, such as a prompt to analyze code for performance or security improvements, or a prompt for generating a Git commit message.
Connecting a Remote MCP Server to Claude
We can connect a remote MCP server to Claude using Server-Sent Events (SSE). SSE is basically a communication protocol that allows servers to push real-time updates to clients over a single HTTP connection. It provides unidirectional communication: from server to client.
SSE enables Claude to receive quick responses from the MCP servers. Additionally, using SSE allows developers to expose MCP servers over HTTP without the need for complex bidirectional protocols.
For example, you can deploy a remote MCP server on AWS EC2 and connect it to Claude via SSE like this:
{
  "mcpServers": {
    "mcp-aws-remote": {
      "command": "npx",
      "args": [
        "mcp-remote",
        "http://your_EC2_IP:3005/sse",
        "--allow-http"
      ]
    }
  }
}
Conclusion
Connecting MCP servers to Claude allows you to automate workflows and save time. For example, you can connect the File System MCP server to Claude and ask it (through prompts) to create a file, such as a Python MCP server file. Claude will then automatically create the file so you don’t have to create it manually. Similarly, you can connect the Knowledge Graph Memory MCP Server to Claude, which will allow it to remember information about you, your preferences, and projects across chats.
In this article, we’ve discussed in detail how to connect different MCP servers to Claude, including your own MCP server and remote MCP servers.